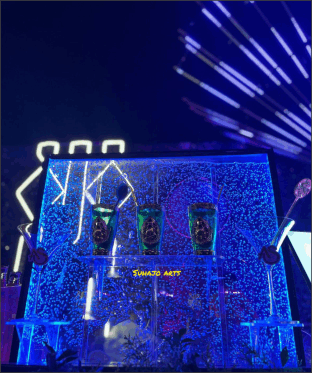
Customise water bubble wall is a stunning and dynamic decorative feature that can transform any space, from homes and offices to restaurants and spas. Customizing a water bubble wall allows you to tailor its design to your specific aesthetic and functional needs. Here’s a guide to help you navigate the customization process effectively.
1. Define the Purpose and Location
The first step in customizing a water bubble wall is to determine its purpose and where it will be installed. Consider whether it will serve as a decorative element, a room divider, or a focal point in the space. The location will influence the size, style, and materials you choose. Ensure the chosen spot has access to an electrical outlet and can support the weight of the wall, especially if it will be mounted.
2. Select the Design and Style
Bubble walls come in various designs, from freestanding units to wall-mounted panels. Decide on a design that complements the existing décor and fits the space available. You can opt for a single large panel or multiple smaller panels for a more intricate look. The frame can be customized in different materials such as stainless steel, aluminium, or wood, each offering a distinct aesthetic.
3. Choose the Bubble Features
Customization options for the bubbles themselves include the size, speed, and pattern of the bubbles. Smaller bubbles create a gentle, soothing effect, while larger bubbles are more visually striking. Adjustable airflow controls allow you to regulate the speed and pattern of the bubbles, providing versatility in the wall’s appearance.
4. Incorporate Lighting
LED lighting is a crucial component of a water bubble wall, adding vibrancy and enhancing the visual impact. Customizing the lighting includes selecting from a range of colours and effects. You can choose a static colour that matches your décor or opt for programmable RGB LED lights that can cycle through different colours and patterns. Remote controls and smartphone apps are available to adjust lighting effects easily.
5. Consider the Materials
The materials used for the bubble wall impact both its look and durability. Acrylic is a popular choice for the panels due to its clarity and strength. It can be customized in various thicknesses and finishes. The frame materials should also be chosen based on the overall design theme and the environment where the wall will be placed.
6. Add Personal Touches
Personalizing your bubble wall can make it truly unique. Consider adding custom graphics, logos, or even etching designs onto the panels. This is particularly beneficial for businesses looking to incorporate branding into the design. Custom shapes and configurations are also possible, allowing the wall to fit perfectly into unusual spaces or to create a specific visual effect.
7. Ensure Easy Maintenance
A custom bubble wall should be designed with maintenance in mind. Features such as easy access to the water reservoir and pumps, and removable panels, can simplify cleaning and upkeep. Using high-quality components will reduce the frequency of maintenance and increase the longevity of the wall.
8. Consult with Professionals
While it’s possible to design a custom water bubble wall on your own, consulting with professionals can ensure the best results. Designers and manufacturers with experience in bubble walls can provide valuable insights and help you avoid common pitfalls. They can also assist with installation and provide ongoing support.
Conclusion
Customizing a water bubble wall involves a blend of aesthetic choices and practical considerations. By defining the purpose, selecting the right design and materials, incorporating dynamic lighting, and adding personal touches, you can create a captivating feature that enhances any space. Professional guidance can further ensure that your custom bubble wall meets all your expectations and stands the test of time.
